Key takeaways
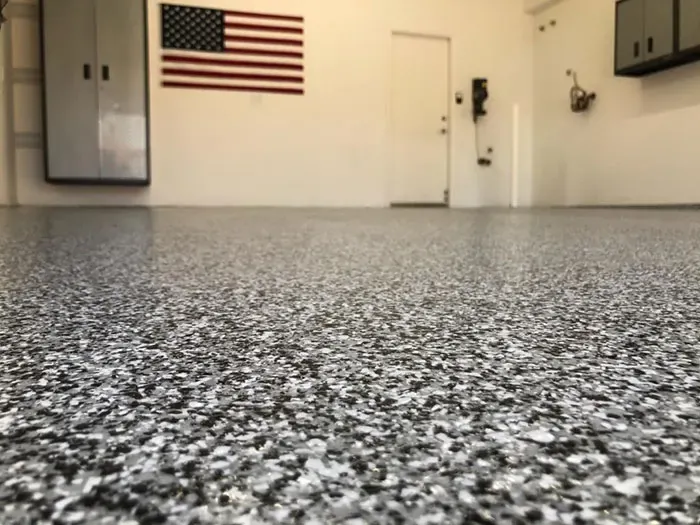
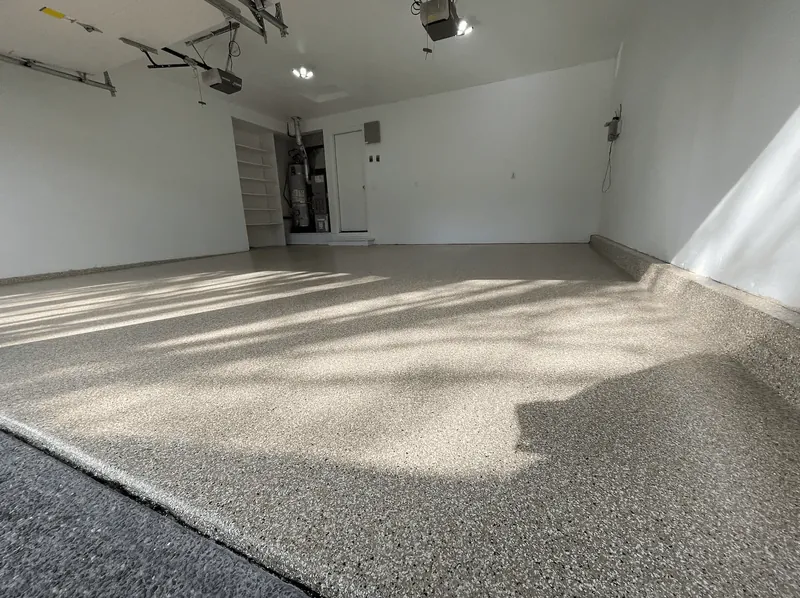
- A full-broadcast flake floor is built in layers over ground concrete: primer, pigmented epoxy base coat, flake broadcast until no wet base shows, scrape and vacuum, then a clear topcoat.
- Prep comes first: test moisture (standard systems allow about 3 lb per 1,000 sq ft per 24 hours or 75–80% RH) and grind to a profile of CSP 3 or more.
- 1/4-inch flake covers about 5–7 sq ft per pound at full broadcast, so a 440 sq ft garage takes roughly 63–88 lb.
- Every layer has a recoat window: a 100%-solids epoxy base coat typically has to be topcoated within 24 hours or sanded first.
- With a slow-cure polyaspartic topcoat, plan on foot traffic after 17–20 hours and vehicles after 24 hours at 72°F or warmer and 50% humidity or more.
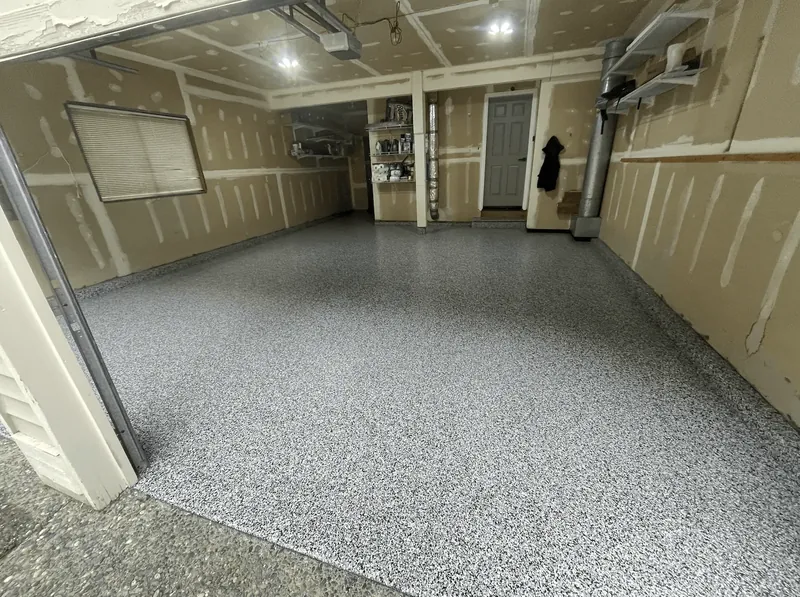
A full-broadcast flake floor goes down in layers over mechanically ground concrete: a thin primer, a pigmented epoxy base coat, vinyl flake thrown into the wet base until no wet spots show, a scrape and vacuum, then a clear topcoat. For a 440 sq ft two-car garage, that’s roughly 63–88 lb of 1/4-inch flake for a full broadcast, and two to three working days with an epoxy base and a polyaspartic topcoat.
The thicknesses, coverage rates and cure times below are for a complete professional system, Simiron’s SimFlake SB. Other systems follow the same order with their own numbers; always work from the system guide for the products you buy. If you’re new to the overall business, start with how to start an epoxy flooring business.
The system in layers
| Layer | Product | Wet film | Coverage |
|---|---|---|---|
| Prepared concrete | Ground to CSP 3+ | — | — |
| Primer | Clear 100%-solids epoxy (Simiron 1000HS) | 3–8 mils | 200–533 sq ft/gal |
| Base coat | Pigmented 100%-solids epoxy (Simiron 1100SL) | 8–12 mils | 134–200 sq ft/gal |
| Broadcast | 1/4-inch vinyl flake | — | About 5–7 sq ft/lb at full broadcast |
| Topcoat | Slow-cure polyaspartic (Simiron Polyaspartic HS) | 10–16 mils | 100–160 sq ft/gal |
The finished system averages about 60 mils nominal. A mil is a thousandth of an inch; see mil and spread rate in the glossary.
Step 1: Inspect the slab and test for moisture
Walk the floor before you quote: cracks, spalls, old sealers or paint, oil stains, and where the slab meets the garage door. Then test for moisture, days before the install, because the tests take time. Standard epoxy and polyaspartic systems allow a moisture vapor emission rate of up to about 3 lb per 1,000 sq ft per 24 hours by ASTM F1869, or 75–80% relative humidity by ASTM F2170, depending on the product. Above that, the system needs a moisture-vapor-barrier primer rated for wetter slabs; some handle up to 25 lb or 95% RH at 16 mils. New concrete must cure at least 28 days. How to run the tests: concrete moisture testing.
Step 2: Grind to the right profile
Diamond grind or shotblast bare concrete to a profile of CSP 3 or more. On a previously coated floor, grind with 30-grit metal diamonds until any grout or topcoat that isn’t epoxy is completely gone. Compare the floor with CSP chips rather than judging by eye; concrete surface profile explains the scale.
Grind with the grinder connected to a dust extractor. If you have employees, OSHA’s silica standard requires the maker’s recommended dust collection system with a 99%-efficient filter and, indoors, a HEPA-filtered vacuum between passes.
Step 3: Edges, cracks and joints
- Edges. Grind along walls, around posts and into corners with a hand grinder and shroud. The coating needs the same profile at the edge as in the middle.
- Cracks and spalls. Patch cracks, holes and spalled areas with epoxy crack filler, or a 100%-solids epoxy thickened with fumed silica, scraped flush. Check again after priming; the primer shows what still needs patching. Crack and joint repair before coating covers which cracks to fill and which to honor.
- Joints. Honor isolation, expansion and moving joints with joint material after the coating is installed. Contraction (sawcut) joints can be filled and coated over, but the coating may crack there if the slab moves. Tell the customer before you start.
- Termination points. Sawcut and key in the coating where it ends at drains and high-traffic impact points. Where the coating stops at the garage door is a termination point too. Where walls meet the floor, a cove base carries the system up the wall.
Step 4: Clean, tape and set up
HEPA-vacuum the whole floor; don’t dry-sweep concrete dust. Tape the perimeter where the coating will stop. Set up a mixing station as close to the floor as you can, covered with plastic or cardboard taped down, with every tool, kit and piece of PPE laid out before the first mix.
Step 5: Prime
Mix only what you can apply in 10–15 minutes: pre-mix the base for one minute, add the activator, and mix for three minutes. Pour a long bead and spread it with a flat squeegee or spring blade at 3–8 mils. A tight, thin coat of primer with no back-roll is the best way to keep outgassing bubbles out of the floor.
Timing matters too. Apply the first coat when the slab is at its warmest and starting to cool, so the resin is drawn into the pores instead of air being pushed out through it. In a garage that warms up during the day, that usually means later in the afternoon rather than first thing in the morning. A 100%-solids epoxy primer is typically ready for the base coat after about 6 hours and has to be recoated within 24.
Step 6: Base coat and broadcast
- Tint the base to the flake. Tint the clear base to match the main color of the flake blend, so any spot the flake misses doesn’t stand out.
- Mix and pour. Same routine: one-minute pre-mix, three-minute mix, no more than you can apply in 10–15 minutes, poured straight onto the floor in an 8–12-inch bead. Don’t scrape the pail or turn it over to drain; unmixed material running down the bucket walls leaves sticky spots.
- Spread. Wearing spiked shoes, pull a 1/8-inch notched squeegee along the bead at 8–12 mils, then back-roll with a 3/8-inch shed-resistant roller to even out the film.
- Broadcast. Give the base 10–15 minutes to level, then throw the flake. Grab loosely, throw it high into the air, keep moving around the area instead of standing in one spot, and don’t crush the flakes in your hand. Leave a wet strip at the edge of each section so the next mix can tie in.
- Go to rejection. For a full broadcast, keep throwing until the base won’t accept any more and no wet spots show. A single, lighter broadcast rarely covers the epoxy completely, which is why the base is tinted to match.
How much flake. At full broadcast, 1/4- and 1/8-inch flake covers about 5–7 sq ft per pound, 1/16-inch and hybrid blends about 3–5. Partial broadcasts cover about 25–50 sq ft per pound for heavy coverage, and more for a light scatter. For 440 sq ft of 1/4-inch flake: 440 ÷ 7 = 63 lb to 440 ÷ 5 = 88 lb. The flake calculator does this for any floor and blend.
Step 7: Scrape and vacuum
Once the base has cured enough to walk on (a standard-cure 100%-solids base takes light foot traffic after about 10 hours and can be recoated after about 8 hours at 72°F), vacuum the loose flake. Then scrape the whole floor with a long-handled floor scraper to knock off loosely bonded chips and sharp edges without damaging the coating, and vacuum again.
Step 8: Topcoat
The clear coat locks the flake in and takes the wear. A slow-cure polyaspartic topcoat goes on at 100–160 sq ft per gallon for a 10–16-mil wet film, spread with a flat or notched squeegee and back-rolled with a 3/8-inch roller. The rules that matter:
- Mind the window. The epoxy base has to get its topcoat within 24 hours; miss it and the floor has to be sanded first.
- Watch humidity. Polyaspartic cures faster in humid air: a slow-cure version gives about 70 minutes of working time at 72°F and 20% humidity but only about 28 minutes at 80%. In hot or humid weather, dip-and-roll from a pan with an 18-inch roller.
- Keep tie-ins fresh. Don’t let more than 5–10 minutes pass between mixes, and use joints as natural breaks.
- Don’t flood it. Applying it thicker than specified, letting it pool, or rolling into material that has started to set can leave a white, hazy finish.
- Second coat for a smoother feel. A 6–8-mil second coat can go on within 24 hours if the customer wants less texture.
Slip resistance
Flake under a clear coat leaves texture. A slow polyaspartic topcoat at 14 mils over full flake tests at a wet dynamic coefficient of friction of about 0.63 under ANSI A326.3, well above the 0.42 the standard sets for level interior floors that get walked on wet. A second, thicker topcoat makes the floor smoother; for ramps or wet areas, add an anti-slip aggregate.
Cove (optional)
In kitchens, labs and other wash-down spaces, the coating often runs up the wall as an integral cove base, usually with a ¾-inch or 1-inch radius. In a residential garage it’s an option to price separately, not part of the standard system.
Step 9: Cure and return to service
Typical times for this system:
| Milestone | Time | Conditions |
|---|---|---|
| Base coat: light foot traffic | About 10 hours (standard cure) | 72°F, 50% RH |
| Base coat: topcoat window | 8–24 hours | 72°F, 50% RH |
| Topcoat: foot traffic | 17–20 hours (slow cure) | 72°F, 80% RH |
| Topcoat: heavy traffic and vehicles | 24 hours | At least 72°F and 50% RH; longer if cooler or drier |
| Base coat: full cure | About 5 days | 72°F, 50% RH |
Cold slows every number in this table. Epoxy cure time, temperature and humidity explains how to plan around the weather and the dew point.
A typical sequence for a two-car garage
For a 20 × 22 ft (440 sq ft) garage at about 72°F:
| When | What |
|---|---|
| A week or more before | Moisture tests placed and read; quote final |
| Day 1 | Grind, edge, repair cracks, vacuum; prime in the afternoon as the slab cools |
| Day 2, morning | Base coat (2.2–3.3 gal at 134–200 sq ft/gal) and flake broadcast (63–88 lb) |
| Day 2, evening or Day 3, morning | Scrape, vacuum, topcoat (2.8–4.4 gal at 100–160 sq ft/gal), within 24 hours of the base |
| About a day after the topcoat | Foot traffic; vehicles once the 24-hour heavy-traffic time has passed in warm, humid enough conditions |
One-day systems compress this. A one-day polyaspartic flake system skips the primer, uses a fast-cure polyaspartic as the base, broadcasts flake immediately before the surface skins over, and finishes with a slow-cure polyaspartic topcoat. The trade-offs are covered in polyaspartic vs epoxy.
Mistakes that cost callbacks
- Skipping the moisture test. Moisture vapor coming up through the slab peels coatings off.
- Under-grinding. A smooth, sealed or troweled surface gives the primer nothing to grip.
- Skipping the primer on porous concrete, then chasing outgassing bubbles in the base.
- Mixing fast or partially. High drill speeds whip in air; partial kits throw off the ratio.
- Uneven broadcast. Crushing flakes in the hand, rushing, and using the settled fines from the bottom of the box all leave blotchy areas.
- Late topcoat. Past the 24-hour window, the base must be sanded before it will bond.
- Thick, pooled topcoat that dries hazy.
- Uncovered base coat. An epoxy base left showing between chips yellows over time in sunlight; full coverage and a UV-stable topcoat protect it.
More failure modes, with causes and prevention, are in why epoxy floors fail.
Watch it, replay it, then do it on the slab. Broadcasting evenly, judging rejection and timing the topcoat are skills you learn by seeing them done and then doing them. In The Epoxy Playbook you watch the full installation, replay any step as often as you need, then do it yourself on real slabs; our garage floor coating training page lists the hands-on classes. The coverage calculator turns any floor into a materials order.
Questions
How long does it take to install a flake epoxy floor?
With an epoxy base and polyaspartic topcoat, plan two to three working days: grind, repair and prime on day one, base coat and flake on day two, scrape and topcoat on day two or three, then wait for the topcoat's traffic times. One-day systems use a fast polyaspartic base so every coat goes down the same day. Moisture tests have to be done days before either.
How much flake do I need per square foot?
For a full broadcast of 1/4-inch flake, about 5–7 sq ft per pound; 6 sq ft per pound is a common planning number. Smaller flake covers less: 1/16-inch and hybrid blends cover about 3–5 sq ft per pound. The flake calculator does the arithmetic for your floor.
What is the difference between full and partial broadcast?
A full broadcast keeps throwing flake into the wet base coat until it won't accept any more and no wet spots show. A partial broadcast scatters flake over a solid-color base, at roughly 25–50 sq ft per pound.
Do I need a primer under a flake floor?
On an epoxy flake system, yes. A thin 100%-solids epoxy primer seals the concrete and cuts outgassing bubbles, and skipping it is a known cause of delamination. Some one-day polyaspartic systems go straight onto the ground concrete; follow the system guide you're using.
When can I drive on a new flake floor?
It depends on the topcoat and the conditions. A polyaspartic topcoat typically takes vehicles 24 hours after application when it's at least 72°F with 50% humidity or more, and longer in cooler or drier conditions. The epoxy base under it reaches full cure in about five days.
Keep reading
Polyaspartic vs epoxy floor coatings: how they differ and when to use each
Polyaspartic vs epoxy compared from data sheets: chemistry, working time, cure speed, UV stability, temperature, odor and cost, and the systems that use both.
Concrete surface profile (CSP): the ICRI scale and what your coating needs
ICRI's concrete surface profile (CSP) scale: CSP 1–10, the profile thin and thick coatings need, and what grinding, shotblasting and acid etching produce.
Why epoxy floors fail: causes, prevention and how to handle a callback
Why epoxy floors fail and how to prevent it: delamination, hot tire pickup, amine blush, bubbles, fisheyes, yellowing, uneven flake, edge peeling and cracks.