Key takeaways
- Epoxy cove base carries the floor coating up the wall in a curve, usually 4 or 6 inches high with a 3/4- or 1-inch radius, so floor and wall clean as one seamless surface.
- Food establishments need coved floor-wall junctures under the FDA Food Code as adopted by state and local health departments; healthcare, labs and wet rooms commonly specify cove too.
- Cove mortar goes onto primer that is still tacky, is shaped with a cove trowel and brushed smooth, and the tape comes off as it stiffens, usually 30–60 minutes later.
- In most systems the cove goes in before the floor coating, so the floor's coats run continuously over cove and floor.
- Price cove per linear foot from your own numbers: kit cost divided by the feet each kit makes at your height, plus measured crew hours per foot at your loaded labor rate, setup, overhead and margin.
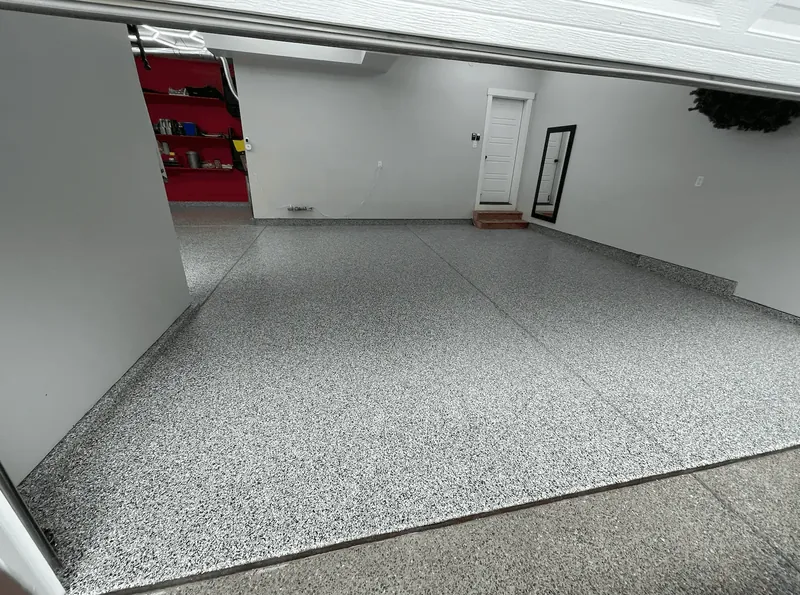
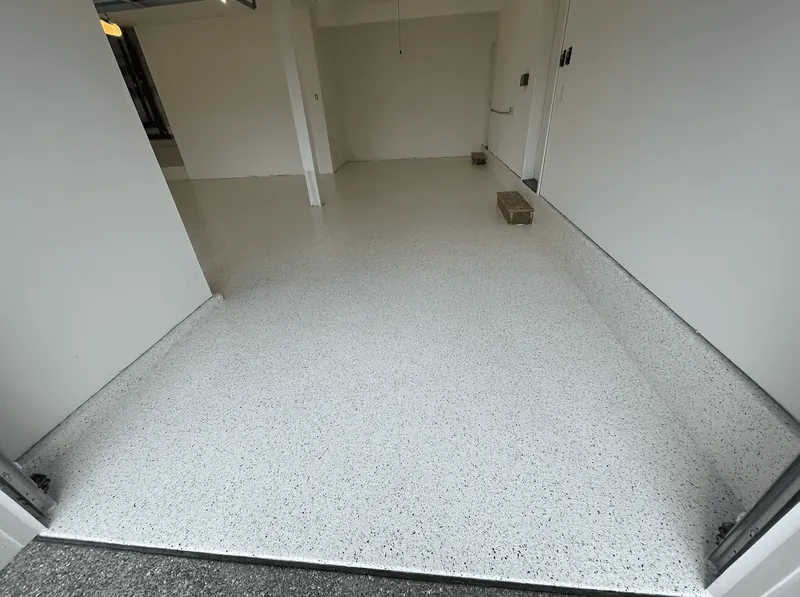
Epoxy cove base carries the floor coating up the wall in a curve, usually 4 or 6 inches high with a 3/4- or 1-inch radius at the bottom, so the floor and wall form one seamless surface with no corner for water and dirt to collect in. It’s troweled from an epoxy mortar onto primed wall, shaped with a cove trowel, then coated along with the floor. Food establishments need it to pass inspection; garage and showroom customers buy it for the finished look.
Here are the types of cove, the usual dimensions, where it’s required, the installation steps and a way to price it per linear foot from your own numbers.
Integral, flake and cant cove
| Type | What it is | Where it’s used |
|---|---|---|
| Integral radius cove (sanitary cove) | Epoxy mortar troweled into a curve, solid color or quartz, topcoated with the floor | Commercial kitchens, food plants, healthcare, labs, restrooms, showers |
| Flake cove | A troweled cove, or pre-formed cove pieces glued in place, coated and broadcast with flake to match the floor | Garages, showrooms, basements |
| Cant cove | Mortar formed at a 45-degree angle, from about 3/4 by 3/4 inch up to 6 by 6 inches | Food processing, freezers and rooms where carts would hit the wall |
| Stem wall coating | Base coat and flake on a garage’s concrete curb, with no curve | Residential garages |
All of these differ from rubber or vinyl cove base, which is trim glued on after the flooring and can leave a gap where water gets behind it. Integral cove is part of the floor, so a squeegee pulls water off the wall line instead of pushing it underneath.
Cant cove works as a curb. Where a wall moves differently from the slab, such as a metal freezer panel, cant cove tends to separate along its top edge, which is easier to repair than the face cracking you get on a radius cove. It also uses a lot of mortar, so price it accordingly.
Heights and dimensions
- Height. 4 inches is standard, and 6 inches is common in kitchens and wet areas. Go by the project spec or the health department where either sets a height.
- Radius. A 3/4- or 1-inch radius is the usual US spec. The floor’s coats build up at the toe and take a little radius away, so some installers go slightly larger.
- Thickness. About 1/8–1/4 inch at the wall.
- Top edge. Most floors look best with the top of the cove level, even where the floor slopes to a drain. The edge finishes at a taped line, a cove strip (an L-shaped cap strip that sets an even thickness) or a key about 1/8 inch deep sawn into a concrete wall so the top ends flush.
Where cove base is required
In food establishments, the FDA Food Code, as adopted by state and local health departments, requires floor-wall junctures to be coved and closed to no more than 1/32 inch. Where floors are cleaned by flushing with water, the floor also has to be graded to drains and the junctures coved and sealed. That covers restaurant kitchens, dish areas, walk-in coolers and the food areas of stores. Health departments adopt different versions of the code and add their own rules, so check with the local plan reviewer before you bid a food job. Food processing plants answer to separate federal and state rules; on those jobs, build what the spec calls for.
Beyond food, integral cove is commonly specified in hospitals and clinics, labs, pharmaceutical plants, cleanrooms, veterinary clinics, kennels, restrooms, locker rooms, showers, schools and daycares. On a commercial bid, read the flooring spec for cove height, radius, top termination and whether cove runs around columns and equipment pads. Specs often leave cove details out, so ask the architect or general contractor before you price it; bidding commercial epoxy flooring jobs covers reading the spec.
In a garage, cove is never required. It’s an upgrade, and a good one to offer when you measure the floor.
Materials and tools
- Cove mortar: a pre-measured kit (resin, hardener and graded sand or quartz), or epoxy thickened with fumed silica and mixed with trowel-grade sand.
- Epoxy primer for the wall, about 150–160 sq ft per gallon, and fine silica to broadcast into it if the system calls for it.
- Cove trowels for each height (4-inch and 6-inch) with the radius you need, plus inside and outside corner tools.
- Flat trowel, margin trowel and chip brushes.
- Duct tape or a strong masking tape, cove strips and a laser level or chalk line.
- A tool lubricant or solvent the data sheet allows, used sparingly.
- A drill with a mixing paddle, or a mortar mixer for larger runs.
- A work light aimed down the wall, which shows trowel marks and waves.
- A sanding stone or 120-grit screen and a vacuum.
Installing integral cove, step by step
- Prep the floor and the wall. Grind the floor right to the wall with the rest of the slab. The wall has to be sound, clean and abraded: grind or sand off paint, sealer and gloss, remove anything loose, and fill voids in block. Concrete and block make the best walls; on other materials, follow what the system approves.
- Strike the line. Mark the cove height with a laser level or chalk line, keeping the top level. Mask just above the line with duct tape pressed down hard, set a cove strip, or saw a shallow key. Tape the floor where the toe of the cove will end to keep mortar off it.
- Prime. Brush or roll primer on the wall up to the line and an inch or so onto the floor. The mortar has to go on while the primer is tacky, so prime only as much as you can cove within its tack time, often about an hour at 68°F. If the primer goes glossy or dry, prime again. A light broadcast of fine silica into the tacky primer helps the mortar build and hold.
- Mix the mortar. Mix the resin and hardener first, then add the aggregate slowly and keep mixing until every grain is wet. Mix full kits only. The mortar should be stiff enough to stay on the wall without sagging and soft enough to tool.
- Hang it. Press the mortar onto the wall with a flat or margin trowel, working sideways along the wall and up to the tape line. Keep it thin at the bottom. Finish the vertical face before you form the radius.
- Form the cove. Run the cove trowel along the wall with more pressure on its trailing edge. Keep the trowel clean and lightly lubricated. Don’t overwork the mortar; over-troweling can raise small blisters.
- Brush it smooth. Draw a chip brush, barely dampened, along the cove to close surface voids and take out trowel marks. Check it with the light raked down the wall.
- Pull the tape. When the mortar starts to stiffen, usually 30–60 minutes, pull the tape. Wait too long and it won’t come off cleanly. Smooth the top edge with a margin trowel and clean any excess off the toe.
- Cure and dress. Let it cure, typically overnight (some mortars need at least 8 hours at 73°F before coating). Knock off high spots with a stone or sanding screen and vacuum.
- Seal it with the floor. Cove mortar is porous, so it gets a grout or seal coat, then the floor’s base coat and topcoat run over cove and floor together. Keep each coat inside its recoat window so the system bonds as one.
On a quartz floor, the cove is often troweled with a quartz mortar and grouted with the floor’s clear grout coat, so cove and floor match.
Flake cove and stem walls
For a garage or showroom with a flake floor, the cove or stem wall gets flaked to match:
- Build the cove or prep the wall. Trowel a mortar cove as above, or glue pre-formed cove pieces to the wall and floor and caulk the seams smooth. For a plain stem wall, grind or sand it to a profile and mask above it.
- Coat thin. Brush or roll a thin coat of base coat onto the vertical surface. Too much runs down the wall before the flake goes on.
- Flake it. Throw flake underhand or sideways into the wet coat, or put flake on the floor in front of the wall and push it up into the coat with a putty knife or gloved hand. Work in 2–3 foot sections so the coat stays wet ahead of you.
- Do the walls first. Flake coves and stem walls before the floor so you aren’t reaching over a wet floor.
- Scrape, sand and topcoat. Once cured, scrape and sand off loose chips, vacuum, and topcoat the walls with the floor.
Pricing cove base by the linear foot
Cove is priced per linear foot on top of the floor price. Build the number from your own costs:
- Measure the run. Linear feet along each wall, plus around columns, curbs and equipment pads, minus doorways. Count inside and outside corners, pipe penetrations and drains near walls; each one takes extra time.
- Material per foot. Divide the kit price by the linear feet it makes at your height and thickness; kits typically make about 19–35 feet of 4-inch cove and 15–28 feet of 6-inch cove. Add primer and the coats and flake that go on the cove surface.
- Labor per foot. Time your crew on the first few jobs to get hours per linear foot, then multiply by your loaded hourly labor rate. Corners, penetrations and rough walls add time.
- Setup and minimum. If the cove needs its own trip or adds a day, charge for it, and set a minimum charge for short runs.
- Overhead and margin. Run the total through the job pricing calculator.
| Line | How to work it out | Your number |
|---|---|---|
| Linear feet | Measured run, minus doorways | |
| Kits | Linear feet ÷ feet per kit at your height, rounded up, plus waste | |
| Material | Kits × kit price, plus primer, coats and flake | |
| Crew hours | Linear feet × your hours per foot, plus corners and penetrations | |
| Labor | Crew hours × loaded labor rate | |
| Setup | Extra trips, masking and protection | |
| Price | All costs plus overhead and margin | |
| Price per linear foot | Price ÷ linear feet |
Put the cove on its own line in the estimate template, with the height, radius and finish written out, so the customer knows exactly what they’re buying.
Learning to trowel cove
Troweling cove is a hand skill that comes from repetition. Practice on a mock-up wall of block or plywood before you do it on a customer’s wall, and expect the first runs to be slow. A complete hands-on class covers cove base along with other details like steps and transitions; how classes compare shows what to look for. The Epoxy Playbook, recorded hands-on installation training you can replay, is required before the hands-on class. If you’re still setting up the business, start with how to start an epoxy flooring business.
Questions
How high should epoxy cove base be?
Four inches is the standard height and 6 inches is common in commercial kitchens, food plants and other wet areas. Follow the project spec or the health department where there is one. The radius at the bottom is usually 3/4 or 1 inch, and the cove is typically 1/8–1/4 inch thick at the wall.
Is cove base required in commercial kitchens?
In food establishments, yes. The FDA Food Code, as adopted by state and local health departments, requires floor-wall junctures to be coved and closed, and floors cleaned by water flushing to be graded to drains with the junctures coved and sealed. Check with the local health department before you bid, because adopted versions and local rules vary.
Do you install cove base before or after the floor coating?
Before, in most systems. The floor is prepped, the cove is troweled onto the primed wall, then the floor's base coat and topcoat run over the cove and the floor together, so the finished surface is one continuous coating. Check the system's data sheet; a few sequence it differently.
How do you price epoxy cove base?
By the linear foot. Work out material per foot from the kit price and the feet each kit makes at your cove height, add your measured crew hours per foot at your loaded labor rate, add setup and a minimum charge for short runs, then add overhead and margin.
Can you put flake on a cove base?
Yes. Once the cove mortar has cured, brush a thin base coat onto it, throw or press flake into the wet coat by hand, then scrape and sand off the loose chips and topcoat it with the floor. It makes the cove match a flake floor.
Keep reading
Quartz broadcast floors: how they're built and where they belong
How quartz broadcast epoxy floors are built: single vs double broadcast, about 0.5 lb of quartz per sq ft per broadcast, slip resistance, uses and quartz vs flake.
How to install a full-broadcast flake floor, step by step
Install a full-broadcast flake epoxy floor step by step: moisture test, grind to CSP 3, repairs, primer, base coat, flake at 5–7 sq ft per lb, topcoat and cure.
How to measure a floor for an epoxy estimate
Measure a floor for an epoxy estimate: tools, odd-shaped rooms, deductions, what to record about cracks, coatings, moisture, access and power, and what to photograph.